Crispy Sweet and Sour Chicken | Better Than Takeout
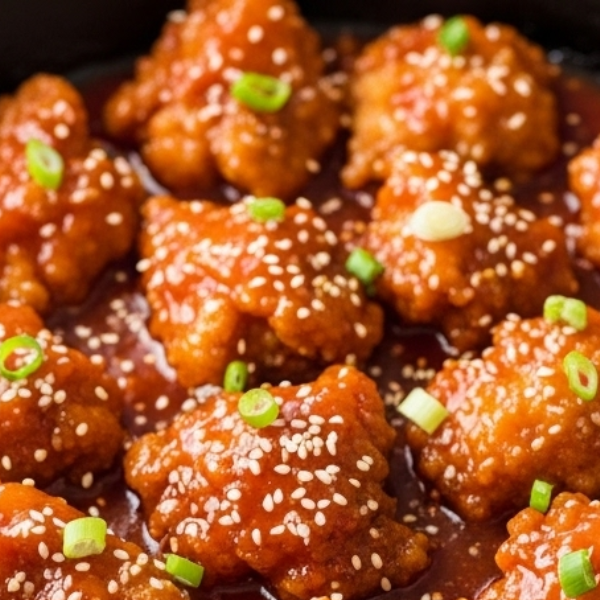
Few takeout classics are as beloved as Sweet and Sour Chicken—crispy golden chicken coated in a glossy sauce that’s equal parts tangy, sweet, and savory. Now, you can recreate that restaurant-quality flavor right at home with this Crispy Sweet and Sour Chicken recipe. Served with fluffy rice or noodles, this dish is the ultimate comfort food that never fails to impress.
What makes this recipe so special is the perfect balance of flavors. The chicken is coated and fried (or baked) to achieve a crunchy exterior while staying juicy inside. Then it’s tossed in a vibrant sauce made from pineapple juice, vinegar, ketchup, and soy sauce, creating the iconic sweet-and-sour profile. Add bell peppers and onions for freshness and crunch, and you’ve got a dish that looks as good as it tastes.
This homemade version is not only delicious but also adaptable. You can bake or air fry the chicken for a lighter version, adjust the sweetness to your taste, or even swap the chicken for shrimp, pork, or tofu. It’s a recipe that’s both flexible and family-friendly, making it a must-have for weeknight dinners or entertaining guests.
In the following sections, we’ll go over the benefits of making sweet and sour chicken at home, explore its nutritional highlights, and provide a clear ingredients table so you can get started with confidence.
General Benefits of the Recipe
-
Restaurant Flavor at Home
Enjoy the same taste you love from Chinese takeout without leaving your kitchen. -
Customizable
-
Adjust sweetness or tanginess of the sauce.
-
Bake or air fry instead of deep fry.
-
Add extra vegetables for more nutrition.
-
-
Family-Friendly
Sweet, tangy, and crispy—this dish is a hit with kids and adults alike. -
Versatile Protein Options
Swap chicken with pork, shrimp, or tofu for variety. -
Balanced Flavors
Combines sweetness, sourness, and savoriness in every bite. -
Meal Prep Friendly
Sauce and chicken can be made ahead and combined just before serving. -
Crowd-Pleaser
Perfect for dinner parties, potlucks, or family gatherings. -
Pairs with Many Sides
Goes well with rice, noodles, stir-fried veggies, or even in lettuce wraps.
Nutritional Benefits
-
Chicken Breast: Lean protein source that keeps the dish filling without being heavy.
-
Bell Peppers: High in vitamin C, antioxidants, and fiber.
-
Pineapple Juice: Natural sweetness plus vitamin C and manganese.
-
Garlic & Onion: Provide immune-boosting and anti-inflammatory properties.
-
Vinegar: Adds tang while supporting digestion.
-
Optional Veggies (broccoli, snap peas): Boost fiber, vitamins, and minerals.
While the sauce does contain sugar, making this dish at home allows you to control the amount, making it healthier than most takeout versions.
Ingredients Table
| Ingredient | Quantity | Notes |
|---|---|---|
| Boneless chicken breast | 1 lb (450 g) | Cut into bite-sized pieces |
| Cornstarch | ½ cup | For coating chicken |
| Eggs | 2 large | Beaten, for coating |
| Red and yellow bell peppers | 2 medium | Chopped into chunks |
| Onion | 1 medium | Cut into chunks |
| Garlic cloves | 3 cloves | Minced |
| Ketchup | ¼ cup | Base of the sauce |
| Rice vinegar (or apple cider vinegar) | ¼ cup | Adds tanginess |
| Soy sauce | 3 tbsp | Adds savory depth |
| Brown sugar | ⅓ cup | Balances sourness |
| Pineapple juice | ½ cup | For sweetness and flavor |
| Sesame seeds | 1 tbsp | Optional garnish |
| Green onions | 2 stalks | For garnish |
Step-by-Step Preparation
-
Prepare the Chicken
-
Cut chicken into bite-sized cubes.
-
Season lightly with salt and pepper.
-
-
Coat the Chicken
-
Dredge chicken pieces in cornstarch.
-
Dip into beaten eggs.
-
Coat again lightly with cornstarch for extra crispiness.
-
-
Cook the Chicken
-
Heat oil in a skillet or wok over medium-high heat.
-
Fry chicken in batches until golden brown and crispy.
-
Transfer to a plate lined with paper towels to drain excess oil.
-
-
Make the Sauce
-
In a saucepan, combine ketchup, vinegar, soy sauce, brown sugar, and pineapple juice.
-
Stir and simmer over medium heat until slightly thickened.
-
-
Cook the Vegetables
-
In the same skillet, sauté bell peppers, onion, and garlic until slightly tender but still crisp.
-
-
Combine Everything
-
Add crispy chicken back into the skillet.
-
Pour the sweet and sour sauce over and toss until evenly coated.
-
-
Serve Hot
-
Garnish with sesame seeds and green onions.
-
Serve with steamed rice or noodles.
-
Variations and Creative Twists
-
Lighter Version
Bake or air fry the chicken instead of deep frying. -
Extra Veggies
Add broccoli, snow peas, or carrots for more nutrition and color. -
Spicy Sweet and Sour
Mix in chili flakes or sriracha for a kick. -
Fruit Twist
Add pineapple chunks or even mango for tropical sweetness. -
Gluten-Free Option
Use gluten-free soy sauce and cornstarch for coating. -
Protein Swap
Replace chicken with pork, shrimp, or tofu for variety. -
Sauce Adjustments
Make it less sweet by reducing sugar or add more vinegar for tang.
Serving Suggestions
-
Serve over steamed jasmine rice or fried rice for a classic pairing.
-
Pair with lo mein or stir-fried noodles for variety.
-
Add a side of spring rolls, dumplings, or egg rolls for a full takeout-style meal.
-
For a lighter option, serve with cauliflower rice or lettuce wraps.
-
Garnish with sesame seeds, cilantro, or sliced chili for presentation.
Conclusion
Crispy Sweet and Sour Chicken is the ultimate homemade takeout dish—crispy, juicy chicken coated in a tangy, glossy sauce and paired with colorful veggies. It delivers the same flavor you love from restaurants, but with the flexibility to adjust sweetness, spice, or cooking method to your preference.
Whether you prepare it for a weeknight dinner, a family meal, or to impress guests, this recipe never disappoints. With its balance of crunchy, saucy, sweet, and tangy, it’s a guaranteed crowd-pleaser that deserves a permanent spot in your meal rotation.